When you decide to set up a home office and realize your Wi-Fi isn’t enough, installing Ethernet cables can substantially improve your connection. However, the process involves more than just plugging in cables; it requires careful planning and execution. To guarantee your network is reliable and efficient, it’s important to follow a clear, step-by-step approach. Want to learn how to do it right from start to finish?
Key Takeaways
- Plan cable routes, measure distances, and identify connection points before starting installation.
- Use appropriate tools like drill, fish tape, and wall plates for secure and efficient cable runs.
- Select the right cable type (Cat5e, Cat6, or Cat6a) based on speed and environment needs.
- Properly strip, wire (T568A or T568B), and crimp RJ45 connectors, then test connections.
- Secure cables properly, avoid tension or pinching, and verify network stability after installation.
Installing Ethernet cables might seem intimidating at first, but with the right guidance, it’s a straightforward process. The key is understanding the various installation techniques and the different cable types available, so you can choose the best options for your setup. First, assess your space and determine where you want your Ethernet connections. Measure the distances between devices and your router or switch, making sure you have enough cable length. This planning helps you avoid unnecessary slack or tension, which can damage the cables over time.
Assess your space and measure distances to ensure proper Ethernet cable length and placement.
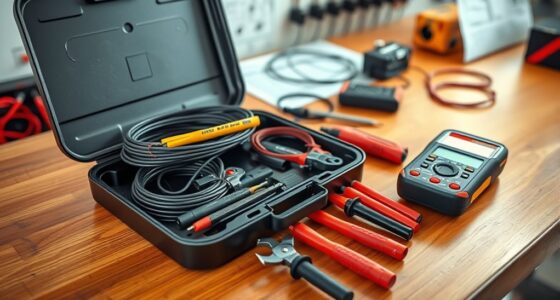
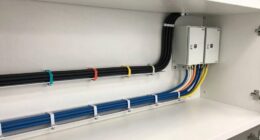
When it comes to installation techniques, there are several approaches to consider. If you’re running cables through walls or ceilings, you’ll need tools like a drill, fish tape, and wall plates. For surface mounting, cable clips or conduit can secure the cables neatly along baseboards or ceilings. If you’re connecting devices in the same room, a simple cable run along the floor or behind furniture might suffice. Whichever method you choose, always prioritize safety—turn off power sources before drilling or cutting into walls and make sure cables aren’t stretched or pinched to prevent damage. Additionally, understanding the arcade machine components can help troubleshoot or enhance your setup if you’re integrating your network with gaming equipment.
Choosing the right cable type is essential for peak performance. Category 5e (Cat5e) cables are suitable for most home networks, supporting speeds up to 1 Gbps. If you’re planning for higher speeds or future-proofing, consider Category 6 (Cat6) or Category 6a (Cat6a) cables, which handle up to 10 Gbps over shorter distances. These cables are often thicker and have tighter twists inside, reducing interference and crosstalk. When selecting cable types, also think about shielding—unshielded twisted pair (UTP) cables are more flexible and easier to install, while shielded twisted pair (STP) cables provide better protection against electromagnetic interference in noisy environments.
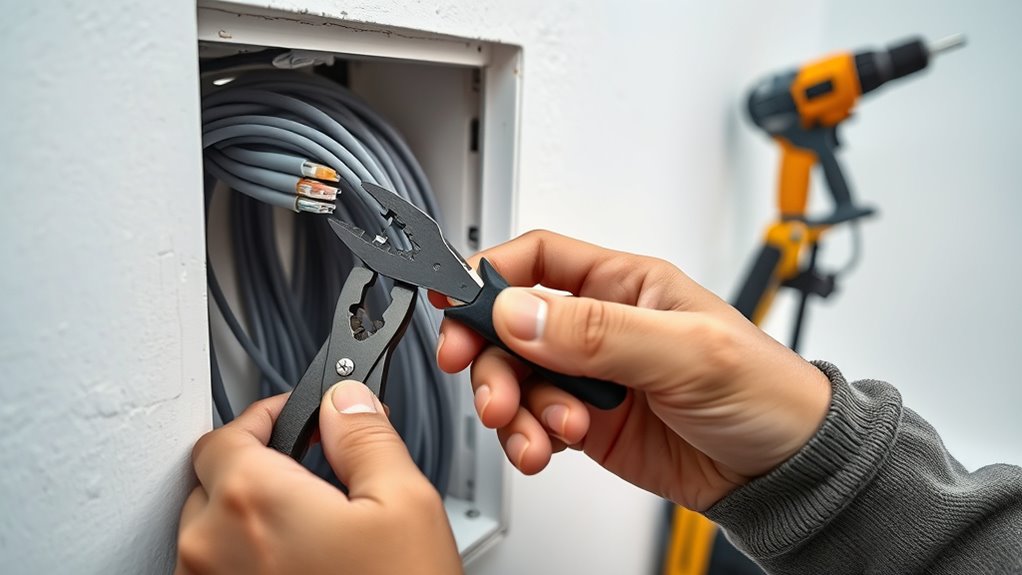
Once you’ve chosen your cables, cut them to length, leaving a little extra for adjustments. Strip the outer jacket carefully, exposing the twisted pairs inside. Follow the wiring standards (T568A or T568B) to terminate the ends with RJ45 connectors, ensuring each wire is inserted correctly and crimped securely. Test your connections with an Ethernet cable tester to verify proper wiring and connectivity before final installation. By applying proper installation techniques and selecting suitable cable types, you guarantee a reliable, high-performing network connection that lasts. With patience and attention to detail, installing Ethernet cables becomes a manageable task, giving you a solid foundation for your internet needs.

Klein Tools VDV526-200 Cable Tester, LAN Scout Jr. 2 Ethernet Tester for CAT 5e, CAT 6/6A Cables with RJ45 Connections
VERSATILE CABLE TESTING: Cable tester for data (RJ45) terminated cables and patch cords, ensuring comprehensive testing capabilities
As an affiliate, we earn on qualifying purchases.
As an affiliate, we earn on qualifying purchases.
Frequently Asked Questions
Can I Install Ethernet Cables Outdoors Safely?
Yes, you can install Ethernet cables outdoors safely by guaranteeing proper outdoor weatherproofing. Use outdoor-rated Ethernet cables designed to withstand moisture and temperature changes. Additionally, install conduit to protect the cables from physical damage and environmental elements. Proper conduit installation keeps your network secure and functional. Always follow local building codes and best practices to ensure a safe, durable outdoor Ethernet setup.
What Tools Are Essential for Cable Termination?
To terminate Ethernet cables effectively, you need crimping tools and cable testers. The crimping tools help secure the RJ45 connectors onto the cable ends, ensuring a solid connection. Cable testers verify that your wiring is correct and functioning properly. You should also have a wire stripper to prepare the cables and possibly a punch-down tool for keystone jacks. These tools make your termination process smooth and reliable.
How Do I Troubleshoot Connectivity Issues After Installation?
When troubleshooting connectivity issues after installation, start by performing cable testing to identify faults or miswiring. Check for interference sources like fluorescent lights or electronics that can disrupt signals. Use a network tester to confirm proper wiring and connection integrity. If issues persist, try interference mitigation techniques—such as rerouting cables away from power lines. These steps help make certain of reliable network performance and pinpoint the root cause of your connectivity problems.
What Is the Maximum Length for Ethernet Cables?
You should keep Ethernet cables within 100 meters (about 328 feet) to prevent signal attenuation, which weakens the connection. The cable insulation quality also matters; high-quality insulation reduces interference and maintains signal strength over longer distances. If you need to extend beyond this limit, consider using network switches or repeaters to boost the signal, ensuring your connection remains stable and fast without losing data quality.
Are There Differences Between Cat5, Cat6, and Cat7 Cables?
You’ll notice differences between Cat5, Cat6, and Cat7 cables regarding cable performance and shielding types. Cat5 offers basic performance suitable for everyday use, while Cat6 provides higher speeds and better shielding against interference. Cat7 takes it further with improved shielding and higher frequency support. Your choice depends on your network needs, with better shielding reducing interference and boosting overall signal quality.
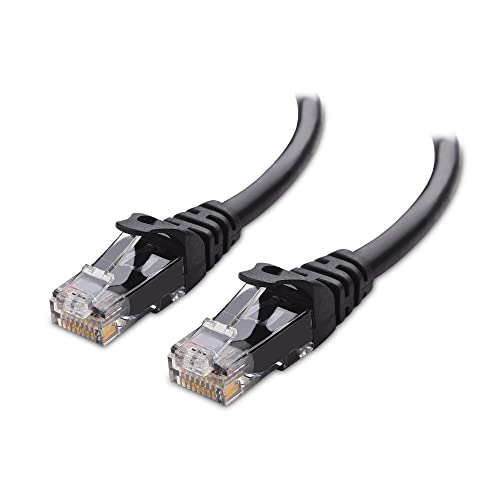
Cable Matters 10Gbps Snagless Cat 6 Ethernet Cable – 25ft, Cat 6 Cable, Cat6 Cord, Ethernet Cord, Black
High-Performance Connectivity: This Cat 6 ethernet cable is designed for superior performance, with a 24 AWG copper wire…
As an affiliate, we earn on qualifying purchases.
As an affiliate, we earn on qualifying purchases.
Conclusion
By planning your routes, choosing the right tools, and following wiring standards, you guarantee a reliable, efficient, and high-performance network. By measuring carefully, installing securely, and testing thoroughly, you create a setup that’s durable, functional, and future-proof. Remember, attention to detail, patience, and precision will make all the difference. With these steps, you’ll enjoy a seamless, stable connection—one that works flawlessly today, tomorrow, and beyond.

Solsop Pass Through RJ45 Crimp Tool Kit All-in-One Ethernet Crimper Cat7 Cat6 Cat5 Crimping Tool with Network Cable Tester, 50-Pack Cat6 RJ45 Pass Through Connector, 50-Pack Connector Boots
Multi-Modular RJ45 Crimper – The Ethernet Crimper is ideal for stripping, cutting, crimping CAT5 CAT5e, CAT6,CAT6A,CAT7 cable and…
As an affiliate, we earn on qualifying purchases.
As an affiliate, we earn on qualifying purchases.

iwillink (2-Pack) Ethernet Wall Plate, 1-Port Keystone Jack Wall Plate with RJ45 Keystone Inline Coupler insert, Female to Female Cat6 Wall Plate, Blue
The ethernet wall plate with a Cat6 RJ45 keystone jacket insert; white design of RJ45 face plate provides…
As an affiliate, we earn on qualifying purchases.
As an affiliate, we earn on qualifying purchases.