
When you need to diagnose network issues or connect two devices directly, making a crossover cable becomes essential. This process requires careful attention to wiring standards and precise termination techniques. If you’re unfamiliar with the steps or want to guarantee your connections are reliable, understanding the proper method can save you time and trouble. There are specific details that can make or break your cable’s performance—let’s explore how to create a dependable crossover cable for your diagnostics.
Key Takeaways
- Use a CAT5e or higher Ethernet cable and prepare both ends with proper stripping and wire arrangement.
- Terminate one end with T568A wiring scheme and the other with T568B to create a crossover configuration.
- Insert wires in the correct order into RJ45 connectors, ensuring they are fully seated before crimping.
- Use a crimping tool to secure the RJ45 connectors firmly onto each cable end.
- Test the completed crossover cable with a network tester to ensure proper pinouts and device communication.
Creating a crossover cable is a straightforward process that allows you to connect two network devices directly for diagnostics or troubleshooting. To do this effectively, you need to understand Ethernet standards and cable pinouts. Ethernet standards define how data is transmitted over the cable, ensuring compatibility between devices, while cable pinouts specify the arrangement of wires within the cable, guiding you on how to connect each wire to the appropriate pins on the connectors.
Connecting two devices directly requires understanding Ethernet standards and cable pinouts for proper setup.
The first step is to gather the necessary tools and materials. You’ll need Ethernet cable (preferably CAT5e or higher for better performance), RJ45 connectors, a crimping tool, and a wire stripper. Before starting, familiarize yourself with the Ethernet standards—most crossover cables follow the T568A and T568B wiring schemes. These standards determine which wires are used for transmitting and receiving signals. For a crossover cable, you’ll need to connect one end in T568A configuration and the other in T568B configuration. This cross-connection allows the transmit pins on one device to connect directly to the receive pins on the other, enabling proper communication.
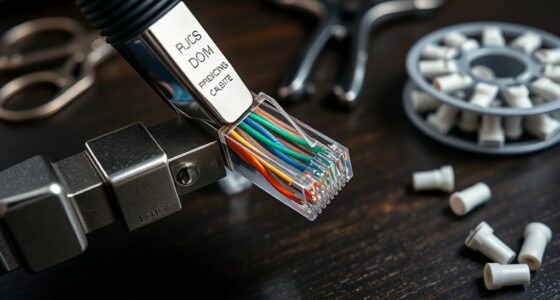
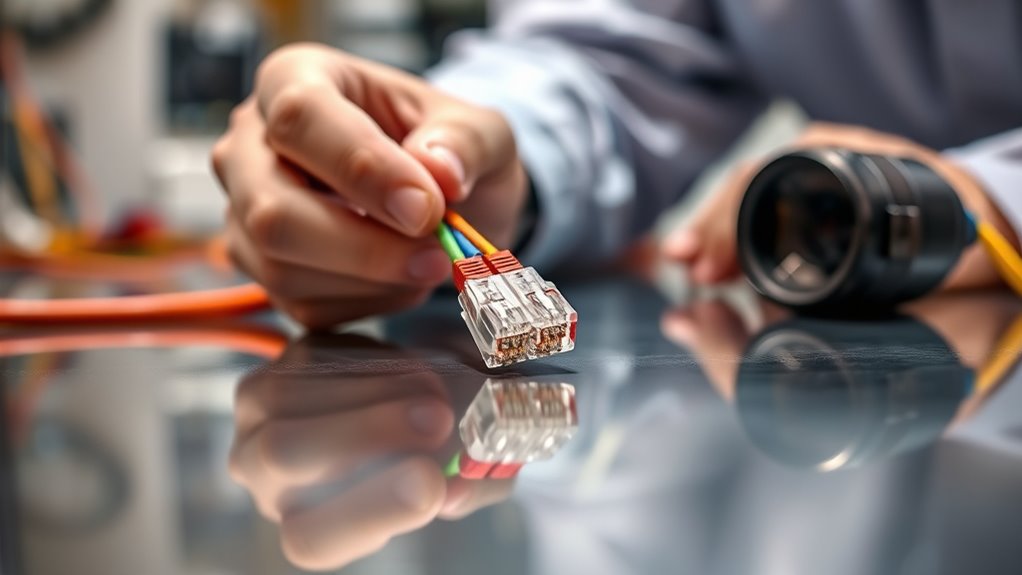
Next, strip about an inch of insulation from each end of the cable, exposing the individual wires. Arrange the wires according to the wiring scheme you’ve chosen. For a standard crossover cable, one end will follow the T568A pinout, with the wires ordered green and white-green, green, orange-white, blue, blue-white, orange, brown-white, brown; the other end will follow the T568B pinout, with wires in orange and white-orange, orange, green-white, blue, blue-white, green, brown-white, brown. Use the wire stripper to carefully trim the wires so they are even and can fit neatly into the RJ45 connector.
Insert the wires into the RJ45 connector in the correct order according to the chosen pinouts. Make sure each wire is fully inserted and in the proper position before using the crimping tool to secure the connector to the cable. Repeat this process for both ends, ensuring the wiring schemes are correct: one end T568A, the other T568B. Once finished, test your crossover cable with a network tester to confirm the pinouts are correct and that the cable can establish a proper connection between devices. Additionally, understanding the contrast ratio of your cables and connectors can help optimize signal clarity and reduce data errors during transmission.

Hitron 5-Port 2.5G Multi-Gig Ethernet Switch (APEX2005), Unmanaged, Fanless Metal Housing, Silent Operation, Ideal for WiFi 6, Gaming, Streaming & Home Office Networks
TRUE 2.5G SPEED ON EVERY PORT – All five ports support full 2.5 Gigabit performance. Perfect for WiFi...
As an affiliate, we earn on qualifying purchases.
Frequently Asked Questions
Can I Use a Crossover Cable for Internet Browsing?
Yes, you can use a crossover cable for internet browsing if your devices support Ethernet standards that allow direct device-to-device connections. Crossover cables are compatible with certain network setups, especially older equipment. However, modern devices and switches often auto-negotiate, making regular Ethernet cables sufficient. Check your device’s cable compatibility and Ethernet standards to guarantee proper connection, but for most cases, a standard Ethernet cable works better.
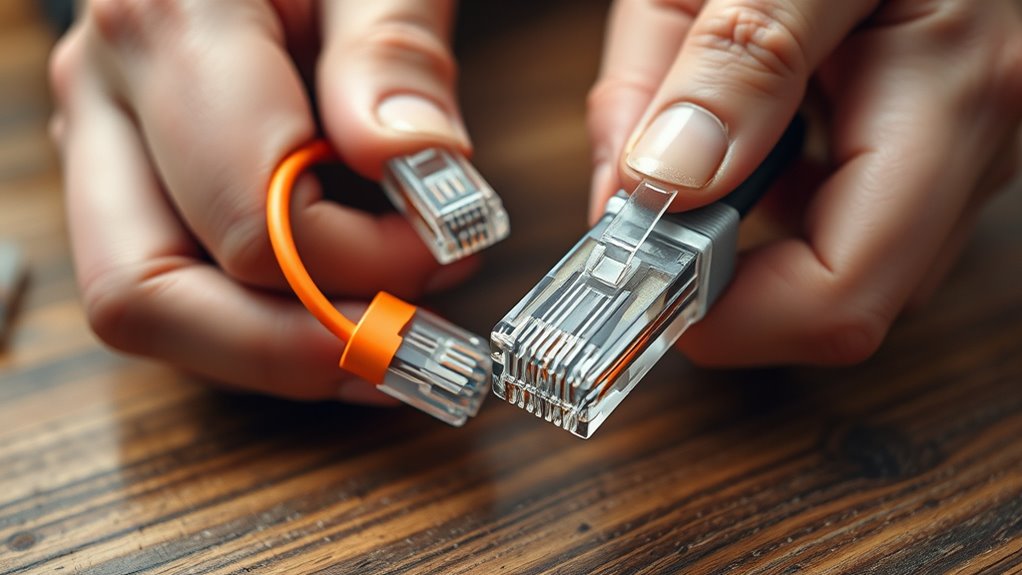
What Is the Difference Between Crossover and Straight-Through Cables?
A crossover cable differs from a straight-through cable in Ethernet wiring and cable standards. With a crossover, you swap the transmit and receive wires on one end, enabling direct device-to-device communication without a hub or switch. Straight-through cables keep the wiring consistent, ideal for connecting devices to network infrastructure. Understanding these differences helps you choose the right cable for your networking needs, ensuring reliable connections and proper data transfer.
Do I Need Special Tools to Make a Crossover Cable?
You don’t need special tools to make a crossover cable, but having crimping tools makes the job easier and more precise. These tools help you attach the connectors securely to the cable ends. After wiring, use cable testers to verify your connections are correct and functioning properly. Investing in good crimping tools and a reliable cable tester guarantees your crossover cable works correctly for diagnostics and network setups.
How Long Can a Crossover Cable Be Without Signal Loss?
Imagine your signal as a delicate whisper traveling through a tunnel; it can only go so far before fading away. Generally, a crossover cable can reach up to 100 meters without significant signal attenuation or loss. Beyond this length, the signal weakens, risking data errors. So, keep your cable length within 100 meters to make certain of reliable communication and prevent the whisper from disappearing into the distance.
Is a Crossover Cable Compatible With All Network Devices?
A crossover cable isn’t compatible with all network devices, as device compatibility depends on network standards. Most modern devices, like computers and switches, support auto-MDIX, which automatically adjusts for crossover or straight-through cables. However, older equipment may require a traditional crossover cable. Always check your device’s specifications to guarantee it supports crossover cables, and be aware that some devices might need specific configurations for proper communication.
D-Link Ethernet Switch, 16 Port Gigabit Slim Switch Plug and Play, Unmanaged, Metal Housing, Quiet Fanless Design, IEEE 802.3az EEE, 5-Year Limited Warranty (DGS-1016S) Black
16 GIGABIT PORTS – High-speed Gigabit ports allow you to connect up to 16 devices for fast file...
As an affiliate, we earn on qualifying purchases.
Conclusion
Once you’ve crimped your crossover cable, imagine it like a bridge linking two devices, each end a mirror reflecting the other’s signals. As you connect it, picture the tiny wires humming with data, ready to traverse seamlessly. This cable becomes your gateway for diagnostics, a silent conductor ensuring smooth communication. With each successful test, you forge a reliable path, turning simple wires into an essential tool that unravels network mysteries with precision and confidence.
TP-Link 24 Port Gigabit Ethernet Switch Desktop/ Rackmount Plug & Play Shielded Ports Sturdy Metal Fanless Quiet Traffic Optimization Unmanaged (TL-SG1024S)
𝙊𝙣𝙚 𝙎𝙬𝙞𝙩𝙘𝙝 𝙈𝙖𝙙𝙚 𝙩𝙤 𝙀𝙭𝙥𝙖𝙣𝙙 𝙉𝙚𝙩𝙬𝙤𝙧𝙠: 24 port of 10/100/1000Mbps RJ45 Ports supporting Auto Negotiation and Auto MDI/MDIX
As an affiliate, we earn on qualifying purchases.

Atroodac Mini Ethernet Switch 5 Ports Gigabit Switch 10/100/1000 Mbps Unmanaged Network Switch Plug & Play Office Ethernet Splitter Fanless Quiet Metal Design Network Hub Desktop Design
Build a home network: The aluminum alloy metal shell of the Ethernet switch has excellent heat dissipation, corrosion...
As an affiliate, we earn on qualifying purchases.