Failing to prepare the right cable installation toolkit can turn a straightforward job into a complete disaster. Without the proper tools and safety equipment, you risk delays, errors, and potential hazards on site. Yet, knowing exactly what to pack and how to organize it can make all the difference between a smooth install and a costly mess. Want to get it right the first time? Keep listening to find out how to assemble the perfect kit.
Key Takeaways
- Gather essential fiber optic tools such as strippers, cleavers, testers, and quality equipment for precise installation.
- Include safety gear like goggles, gloves, helmets, and high-visibility vests to ensure worker protection.
- Organize tools in dedicated cases with clear labels for quick access and to prevent misplacement.
- Prepare general tools like screwdrivers, utility knives, tape measures, and drills for versatile installation needs.
- Pack diagnostic and safety accessories such as electrical testers, lighting, extra safety gear, and automation tools for efficiency.

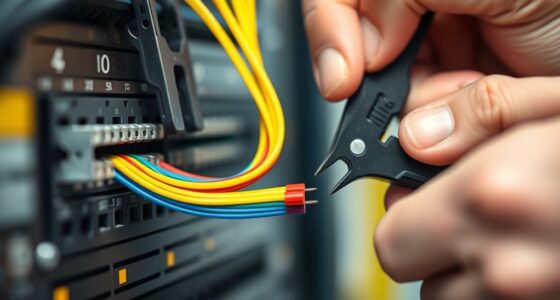
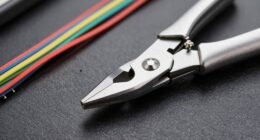
When tackling a cable installation project, having the right toolkit can make all the difference. Before you start, ensure your kit includes essential fiber optic tools designed specifically for handling delicate fiber cables. These tools, such as fiber strippers, cleavers, and testers, are crucial for maintaining the integrity of the fiber and guaranteeing optimal performance. Investing in quality fiber optic tools not only speeds up your work but also reduces the risk of damaging sensitive components. Alongside these tools, safety equipment should top your list. Safety goggles protect your eyes from unexpected fiber shards or debris, while gloves safeguard your hands from cuts and splinters during cable handling and installation. A hard hat and high-visibility vest are also advisable if you’re working in busy or hazardous environments.
Equipping your toolkit with essential fiber optic tools and safety gear ensures efficient, safe, and damage-free cable installations.
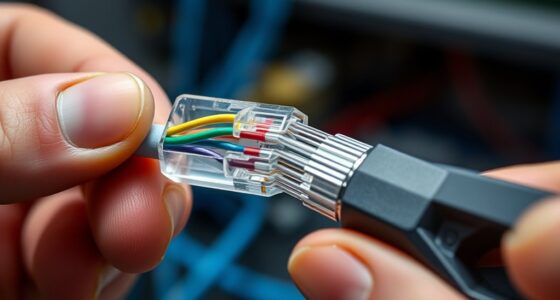
It’s essential to organize your toolkit efficiently. Keep your fiber optic tools in a dedicated case or pouch for quick access, preventing misplacement and damage. Label your tools clearly so you can swiftly identify what you need at any moment. Apart from fiber-specific equipment, include general tools like wire strippers, crimping tools, screwdrivers, and a utility knife. These will help you with mounting brackets, connecting cables, or making adjustments. A sturdy drill with various bits is indispensable for securing fixtures or running cables through walls and ceilings.
Electrical testers and tone generators are indispensable for verifying connections and diagnosing issues early in the process. Having a reliable cable tester designed for fiber optics allows you to check signal quality and guarantee everything functions properly before finalizing the installation. Don’t forget to carry a tape measure and level to guarantee your cables are routed neatly and securely. Incorporating automation technologies can further streamline your workflow by helping you plan cable routes and monitor installation progress remotely.
While assembling your toolkit, consider the working environment. If you’re working outdoors or in confined spaces, pack additional safety equipment like knee pads, dust masks, or protective clothing. Proper lighting, such as headlamps or portable flashlights, can be invaluable in dim areas. Remember, preparation is key; double-check that all your tools are clean, functional, and ready to use. This not only saves time but also minimizes errors or accidents. With the right fiber optic tools and safety equipment in your kit, you’ll be well-equipped to handle any installation efficiently and safely. Proper preparation ensures your project proceeds smoothly, and you’re protected from potential hazards involved in cable installation.

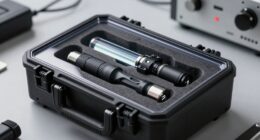
Fiber Optic Termination Tool Kit 10-in-1 Equipped with A-D7 Optical Power Meter (-70 – +10 dBm), FC-6S Fiber Cleaver and Wire Stripping Pliers, Aramid Scissors, Fiber Optic Tool Kit
【Integrated professional solution for fiber optic work】This comprehensive kit includes the basic tools required for fiber optic installation,…
As an affiliate, we earn on qualifying purchases.
As an affiliate, we earn on qualifying purchases.
Frequently Asked Questions
What Safety Gear Is Essential for Cable Installation?
You need to wear personal protective equipment like gloves, safety glasses, and a hard hat to stay safe during cable installation. These items shield you from potential hazards and help follow safety protocols. Always check that your PPE fits properly and is in good condition before starting. Following proper safety gear guidelines reduces the risk of injury and ensures a safer, more efficient installation process.
How Do I Choose the Right Cable Types?
Choosing the right cable types is like selecting the perfect key for a lock; it must fit seamlessly. Focus on cable selection by considering the specific needs of your project, such as bandwidth and environmental conditions. Guarantee material compatibility with connectors and insulation to prevent corrosion and signal loss. Always check specifications and standards to match cable properties with your installation requirements, ensuring a reliable, long-lasting connection.
What Tools Are Best for Outdoor Cable Installation?
For outdoor cable installation, you’ll want to use wireless tools like Bluetooth testers and long-range signal analyzers to guarantee connectivity. Additionally, have a sturdy cable spool, conduit benders, and underground conduits to protect your cables from environmental damage. Don’t forget safety gear like gloves and eye protection. These tools help you efficiently lay cables in challenging outdoor conditions while maintaining signal integrity and protecting your infrastructure.
How Do I Troubleshoot Common Cable Installation Issues?
To troubleshoot common cable installation issues, start by inspecting the cable for damage or loose connections. Use cable splicing techniques to repair any broken sections and guarantee a secure connection. Perform signal testing with a tester to identify weak signals or interference. Check connectors and grounding to prevent signal loss. If issues persist, recheck the cable route for obstructions or damage, and replace faulty sections promptly.
What Maintenance Is Required for Installed Cables?
You need to regularly inspect installed cables for signs of cable aging and insulation degradation. Check for cracks, corrosion, or wear that could impact performance. Clean connectors, ensure secure connections, and replace damaged sections promptly. Keep cables organized to prevent unnecessary stress. By proactively maintaining your cables, you prevent failures, extend their lifespan, and guarantee reliable operation. Regular maintenance is essential for peak performance and safety of your cable system.
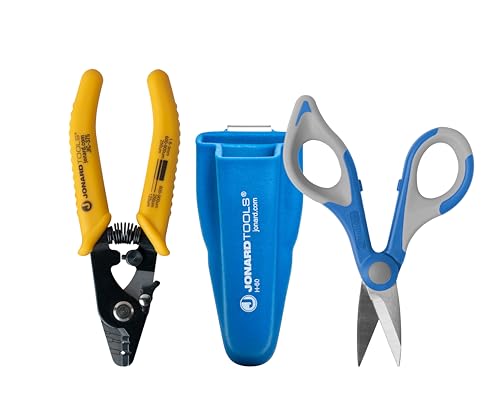
Jonard Tools TK-350 Fiber Optic Stripper & Kevlar Shears Kit – Featuring Molded Pouch to Securely Hold 3 Hole Fiber Stripper and Kevlar Cutting Shears – Ideal for Fiber Technicians
JIC-375 FIBER STRIPPER: Strips the 1. 6 mm-3 mm fiber jacket, 600-900 micron buffer coating, and 250 micron…
As an affiliate, we earn on qualifying purchases.
As an affiliate, we earn on qualifying purchases.
Conclusion
By assembling the right toolkit, you guarantee a safer, more efficient cable installation process. Did you know that proper tools can reduce installation errors by up to 30%? This not only saves time but also guarantees better signal quality and long-term reliability. Investing in quality equipment and organization isn’t just about convenience—it’s about delivering professional results every time. Stay prepared, stay safe, and watch your projects succeed with the right toolkit in hand.

D YEDEMC Fiber Optic Cable Tester Portable Optical Fiber Power Meter FC/SC/ST Universal Interface Integrated OPM, VFL, and RJ45 Functions (OPM-VFL-1)
Function: can measure 8 standdard wavelengths 850/980/1300/1310/1490/ 1550/1625/1650nm , test range: -70dBm~+6dBm, Integrated OPM, VFL, and RJ45 Functions.
As an affiliate, we earn on qualifying purchases.
As an affiliate, we earn on qualifying purchases.

LAICCUM 4 Pack Stage Light Safety Cables for Stage DJ Party Lights Thickened 1/8 Diameter Stainless Steel Security Cable Wire Ropes with Loops and Snap Hook, Max Load 150LB
Packing List: Include 4 pieces of high-quality 304 stainless steel cables with loops; Each length is 2 feet…
As an affiliate, we earn on qualifying purchases.
As an affiliate, we earn on qualifying purchases.