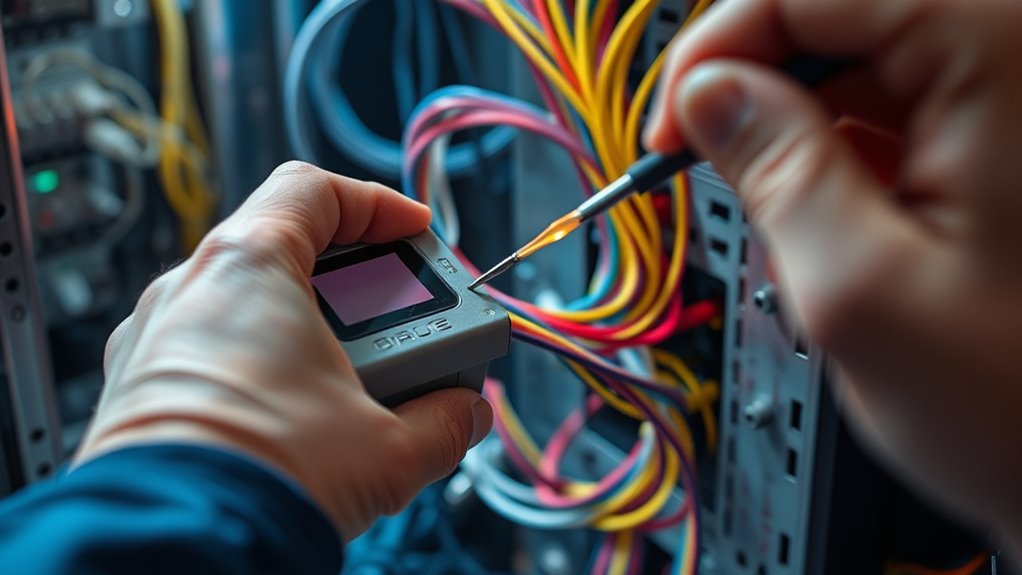
To use a cable tone generator and probe, start by attaching the tone generator to the cable you want to trace, then turn it on. Use the probe to sweep along the bundle, keeping it close to the insulation without pressing hard. Listen for the tone, moving steadily to locate the correct wire. Adjust sensitivity if needed. For more detailed steps and tips, continue exploring to master this handy troubleshooting tool.
Key Takeaways
- Turn on the tone generator and set the probe to appropriate sensitivity before testing.
- Keep the probe close to the cable’s insulation without pressing hard to detect the tone.
- Sweep along the cable bundle systematically while listening for the audible signal.
- Confirm the tone at both ends of the cable to verify continuity and proper connection.
- Adjust probe sensitivity if needed and isolate circuits to prevent signal interference.

Using a cable tone generator and probe is an essential skill for anyone troubleshooting or identifying wires in complex cable setups. When you’re faced with tangled wires or hidden connections, these tools become invaluable for quick and accurate cable identification. They help you distinguish between different cables without the need to disconnect or guess, saving you time and reducing frustration. Mastering their use is a key troubleshooting technique that can prevent unnecessary disassembly and ensure you target the right cable from the start. Proper use of the cable tone generator and probe requires a systematic approach. Start by turning on the tone generator and setting your probe to the appropriate sensitivity. Keep the probe close to the cable’s insulation, but avoid pressing too hard, which could damage the wire or cause false readings. As you sweep along the bundle, listen carefully for the tone. If you lose the signal, check your connections and ensure the generator is functioning properly. If multiple cables emit similar tones, you might need to isolate the circuit or disable other signals to prevent confusion. Additionally, understanding the importance of contrast ratio in image quality can help you evaluate and troubleshoot video signals effectively, ensuring clear and detailed visuals during your cable testing sessions. Troubleshooting techniques come into play when you’re trying to determine if a cable is broken, loose, or disconnected. You can attach the tone generator at one end of the cable and follow the tone at the other end. If you don’t hear the tone at the far end, the cable might be damaged or disconnected. Conversely, if the tone is strong and consistent, you can confidently rule out certain faults. This method helps narrow down issues quickly, making repairs more efficient.

TEMPO Communications 701K-G Wire Tracer Electrical, Tone Generator and Probe Kit (701K Cable Toner)
INDUSTRY STANDARD WIRE TRACER: Unrivalled accuracy in voice, data, and video wiring tracing for flawless installations and repairs…
As an affiliate, we earn on qualifying purchases.
As an affiliate, we earn on qualifying purchases.
Frequently Asked Questions
Can Cable Tone Generators Identify Faulty or Broken Cables?
Cable tone generators primarily assist with cable testing and signal testing, but they can’t directly identify faulty or broken cables. Instead, you use them to trace cables, locate connections, and detect signal continuity. If there’s a break or fault, the signal won’t pass through properly, alerting you to potential issues. However, for precise fault detection, combine tone testing with other tools like a cable tester or multimeter to pinpoint broken or damaged cables effectively.
How Long Can a Cable Tone Generator’s Signal Last?
Think of the cable tone generator’s signal as a whisper in a busy room; it can last for several hours, depending on your setup. The tone signal longevity typically ranges from a few hours up to 24 hours or more, but it largely depends on the device’s power source and the environment. For reliable results, keep the generator powered and avoid interference, ensuring the signal remains strong during your testing.
Are There Safety Precautions When Using a Tone Generator?
Yes, you should take safety precautions when using a tone generator. Always guarantee proper grounding safety to prevent electrical shock and damage. Inspect your equipment before use to check for any damage or loose connections. Keep the area clear of conductive materials, and avoid touching live wires. Following these safety steps helps protect you and ensures accurate results when testing cables.
Can Tone Generators Be Used on Insulated or Armored Cables?
Yes, you can use tone generators on insulated or armored cables, but you should check insulation resistance first to guarantee safety. When testing armored cables, make sure the shield continuity is intact, as this affects the accuracy of your results. Use the tone generator carefully, ensuring it’s compatible with the cable type. Always follow safety guidelines to avoid damaging the cable or risking electrical shock.
How Do I Select the Right Probe for Different Cable Types?
Think of choosing a probe like picking the right key for a lock. You need probe compatibility with different cable insulation types to get accurate results. For insulated cables, use a probe designed for high dielectric strength, while armored cables require a sturdy, shielded probe. Always check the probe’s specifications and match them to your cable type, ensuring reliable tone detection and safe operation.

Klein Tools VDV500-820 Wire Tracer Tone Generator and Probe Kit Continuity Tester for Ethernet, Telephone, Speaker, Coax, Video, and Data Cables, RJ45, RJ11, RJ12
PROFESSIONAL GRADE TONE GENERATOR: Includes a professional-grade analog tone generator and tracing probe for accurate and efficient tracing…
As an affiliate, we earn on qualifying purchases.
As an affiliate, we earn on qualifying purchases.
Conclusion
Now that you know how to use a cable tone generator and probe, you’re ready to tackle wiring issues with confidence. Remember, even in a world where knights once roamed, the right tools make the difference between chaos and order. So, stay sharp, follow the steps, and don’t forget—your skills today will save you from the troubles of tomorrow’s tech labyrinth. With this knowledge, you’re well on your way to becoming a true wiring wizard.
Klein Tools VDV500-820 Wire Tracer Tone Generator and Probe Kit Continuity Tester for Ethernet, Telephone, Speaker, Coax, Video, and Data Cables, RJ45, RJ11, RJ12
PROFESSIONAL GRADE TONE GENERATOR: Includes a professional-grade analog tone generator and tracing probe for accurate and efficient tracing…
As an affiliate, we earn on qualifying purchases.
As an affiliate, we earn on qualifying purchases.

Coax Cable Tester,Coaxial Cable Tester,Tracer,Coax Repair Kit,Signal,Continuity,Coaxial with Voltage Toner (Sound),Coax Cable Toner,RG6, RG59, CATV Wire Tracer(AAA Battery Included)
coaxial cable repair kit: coax tester 1. Determining the continuity of coaxial cable: it detects if a coax…
As an affiliate, we earn on qualifying purchases.
As an affiliate, we earn on qualifying purchases.