When it comes to optimizing your network setup, few tasks are as impactful as installing a wall-mounted rack. It’s a project that demands precision, planning, and attention to detail—factors that can make or break the safety and efficiency of your system. Before you start, understanding the proper steps and precautions is essential. If done correctly, you’ll gain easier access, better organization, and a cleaner look—yet, the process isn’t without its pitfalls.
Key Takeaways
- Select a suitable wall location, ensuring it can support the rack’s weight and has access to power and network connections.
- Use a level to mark and drill mounting holes aligned with the rack’s brackets, ensuring proper placement.
- Secure wall anchors or studs before attaching the rack brackets for stability and safety.
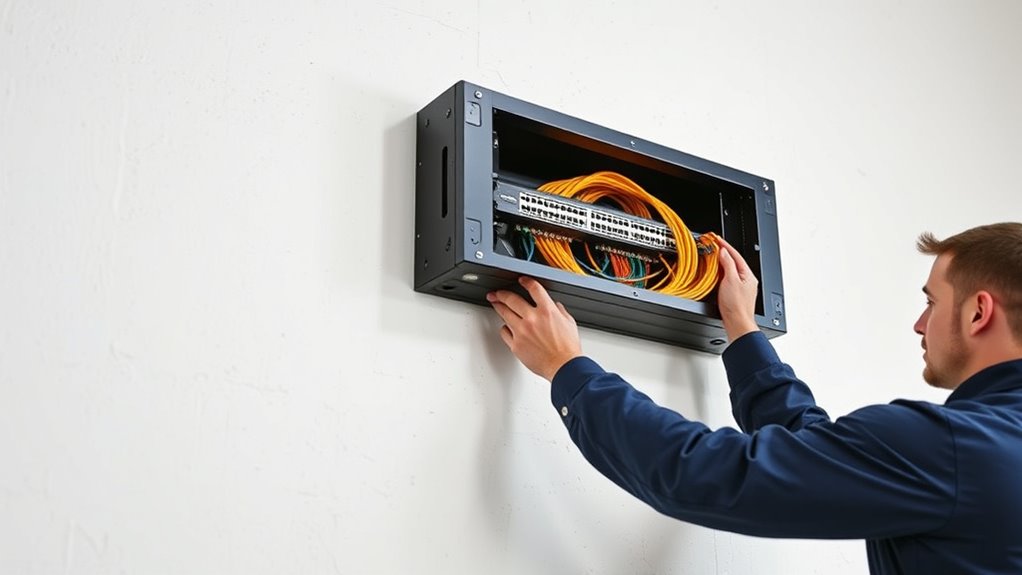
- Mount the rack onto the brackets, verifying it is level and firmly attached.
- Organize and secure cables within the rack to maintain a neat, efficient, and accessible setup.
Installing a wall-mounted network rack is a practical way to organize your networking equipment while saving space. When you set up your rack, good cable management becomes essential. Properly managing your cables not only keeps everything neat but also improves airflow, reduces heat buildup, and makes troubleshooting much easier. To achieve this, you should plan your cable routes carefully before mounting the rack. Use cable ties, Velcro straps, or cable clips to secure cables along the sides or back of the rack. This prevents tangling and accidental disconnections while providing a clean, professional look. A well-organized setup minimizes clutter, helps identify cables quickly, and reduces strain on connectors and ports. Additionally, selecting the right size and type of rack for your equipment ensures optimal space utilization and stability.
Proper cable management ensures a neat, efficient, and reliable network setup with easy troubleshooting and improved airflow.
Next, you’ll need to focus on installing rack mounting brackets. These brackets are vital because they secure your equipment firmly inside the rack, preventing movement and potential damage. Most wall-mounted racks come with pre-drilled holes and compatible brackets, but you should double-check that they match your equipment’s size and weight. When mounting the brackets to the wall, ensure you’re anchoring into studs or solid wall anchors to support the weight securely. Use a level to ensure the brackets are straight, which makes installing equipment easier and prevents equipment from hanging unevenly. Once the brackets are in place, slide your devices—servers, switches, patch panels—onto the brackets, securing them with screws if necessary.
It’s also smart to plan your equipment placement before installing anything. Place heavier items toward the bottom of the rack to maintain stability and prevent tipping. Lighter devices can go higher up for easier access. When mounting devices, make sure they fit snugly into the brackets and are properly secured to avoid accidental dislodging. Keep in mind that accessible front panels and ports should be positioned at a comfortable height for maintenance and adjustments.
Finally, after mounting your equipment, revisit your cable management plan. Use cable management arms or horizontal cable organizers if your rack supports them. Label your cables for quick identification during future maintenance. Good cable management combined with sturdy rack mounting brackets not only keeps your setup tidy but also enhances your network’s reliability and longevity. By paying attention to these details, you’ll create a professional, safe, and efficient network environment, all while saving space and reducing clutter. Proper planning and equipment placement are crucial for optimal performance and ease of access.

Tecmojo 12U Open Frame Network Rack for IT & AV Gear, AV Rack Floor Standing or Wall Mounted,with 2 PCS 1U Rack Shelves & Mounting Hardware,Network Rack for 19" Networking,Audio and Video Device
【Powerful Load-bearing】12U Network Rack Open Frame is constructed from durable cold rolled steel; Rack shelf supports enhance stability,…
As an affiliate, we earn on qualifying purchases.
As an affiliate, we earn on qualifying purchases.
Frequently Asked Questions
What Is the Maximum Weight Capacity for a Wall-Mounted Rack?
The maximum weight capacity for a wall-mounted rack varies, but most models can support between 50 to 200 pounds. You should always check the load limit specified by the manufacturer to guarantee your rack can handle your equipment safely. Exceeding the weight capacity risks damaging the rack or the wall. Always install it on sturdy studs and distribute the load evenly to maintain stability and safety.
Can I Install a Network Rack on Drywall Alone?
You can install a network rack on drywall alone, but you need to use proper drywall anchors to support the weight. Check the anchors’ weight limits and verify they’re rated for your rack’s total weight. For heavier racks, it’s best to locate studs and secure the mount directly into them. This approach ensures stability and safety, preventing the rack from pulling out over time.
How Do I Hide Cables Inside the Wall-Mounted Rack?
To hide cables inside your wall-mounted rack, you should use proper cable management and concealment techniques. Start by installing cable organizers or cable channels inside the rack to route cables neatly. Use cable ties to bundle wires together, minimizing clutter. Consider running cables through the back or side panels, and use cable covers or raceways outside the rack for a cleaner look. Proper management guarantees safety and easy maintenance.
Are There Special Considerations for Outdoor Installations?
Think of outdoor installations as safeguarding your network castle from the storm. You need to weatherproof your rack with specialized enclosures and seals, ensuring it withstands rain, dust, and extreme temperatures. Mount it at a height that keeps it safe from flooding or accidental bumps, while still accessible for maintenance. By considering weatherproofing and ideal mounting height, you turn your outdoor rack into a resilient fortress, ready for whatever nature throws your way.
What Tools Are Necessary for Installation?
You’ll need a tools checklist that includes a drill, level, screwdriver, and measuring tape for installation. Make certain to have appropriate mounting hardware like wall anchors and screws suitable for your wall type. Use the drill for creating holes, the level to ensure proper alignment, and the screwdriver to secure mounting brackets. Having these tools and hardware ready makes the process smoother and ensures your rack is safely installed.

QiaoYoubang 10 Pack of 1.7 x 2.7in Server Rack Cable Management D-Ring Hooks – Network Rack-Mount Cord Organizer Ring Set for Power Cords, Fiber Optic or Network Patch Cables (10DRing)
Each D-Ring Hook Size: 1U, W 1.73 x D 2.7x H 1.73 inches (44 x 68.5 x 44…
As an affiliate, we earn on qualifying purchases.
As an affiliate, we earn on qualifying purchases.
Conclusion
By following these steps, you’ll transform your cluttered space into a well-organized hub of connectivity. Think of your network rack as the backbone of your digital domain—strong, reliable, and ready to support your devices. With careful planning and neat cable management, maintaining your network becomes as effortless as a gentle breeze. Remember, a tidy rack isn’t just about looks; it’s the foundation that keeps your digital world running smoothly.

CCeCCe 1U Rack Mounting Ears Bracket Mount Kit Set Universal Hardware for NETGEAR TP-Link Dell HP D-Link Linksys TRENDnet Buffalo Switches Wireless Microphone Receiver Sequencer Equalizer Amplifier
Package include : 2 Set Universal Rack Mounting Ear with screws
As an affiliate, we earn on qualifying purchases.
As an affiliate, we earn on qualifying purchases.

ZhiYo 2x2in Cable Raceway, Server Rack Cable Management Under Desk Cord Organizer, Electrical Safe PVC Cable Hider Open Slot Wire Raceway for Network/PC/TVs, Wire Duct Black
Easily Manage Your Network and Data Cables: Designed with parallel openings on both sidewalls, making it convenient for…
As an affiliate, we earn on qualifying purchases.
As an affiliate, we earn on qualifying purchases.