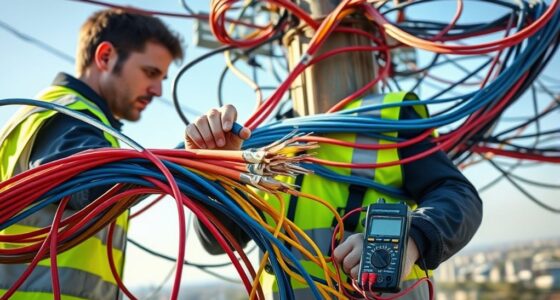
When you use a cable tester, understanding its results is essential to ensuring your cables are functioning correctly. The indicators and measurements it provides can seem straightforward, but interpreting what they mean for your specific setup can be tricky. If you notice a fail or unusual readings, it could signal a problem that needs attention. Knowing what to look for helps you decide whether to repair, replace, or further investigate your cables.
Key Takeaways
- Understand the pass/fail indicators to assess overall cable health quickly.
- Check for specific fault signals like open circuits, shorts, or miswiring indicated by tester diagnostics.
- Compare resistance and signal measurements to manufacturer guidelines to identify issues.
- Look for abnormal readings or deviations from normal parameters to detect internal damage.
- Use detailed diagnostics to pinpoint exact faults and determine if cable repair or replacement is needed.
Interpreting cable tester results can seem complex at first, but understanding what the readings mean is vital for ensuring your cables are functioning properly. When you use a cable tester, you’re fundamentally checking for issues like cable fault detection or confirming that your wiring setup is correct. The key is to focus on the various indicators and measurements provided by the tester, which can tell you whether your cables are in good shape or need repairs. Accurate interpretation depends on understanding what each result signifies and how it relates to your cabling system’s performance.
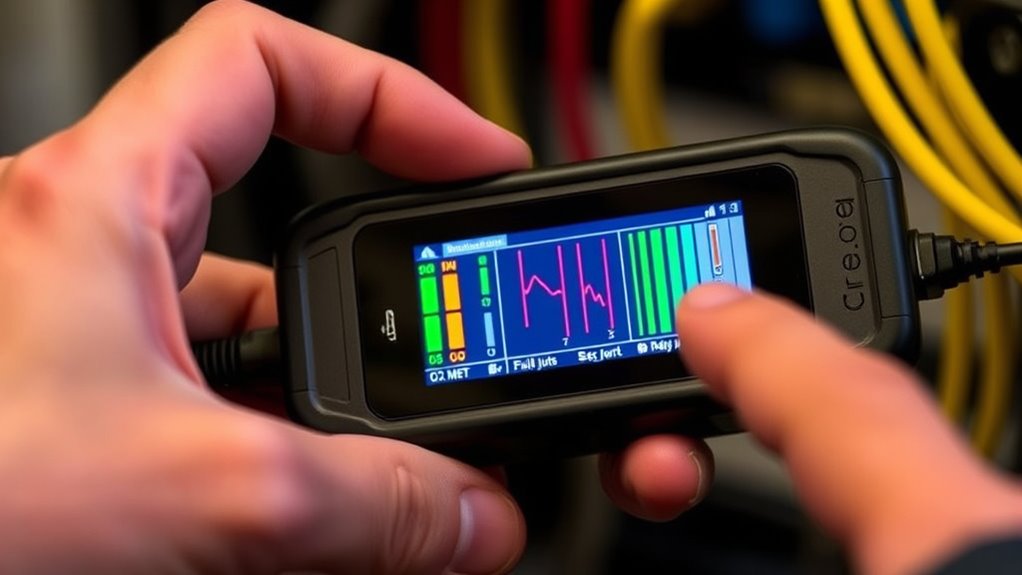
Most cable testers provide a series of signals, lights, or digital readouts that indicate different conditions. For example, a common result might be a pass or fail message, which simplifies your task—if it passes, your cable is likely good; if it fails, there’s probably a problem. However, more advanced testers offer detailed diagnostics, such as pinpointing specific faults like open circuits, shorts, or miswiring. These testers improve testing accuracy because they analyze individual conductors and measure their continuity and insulation integrity. When you see a result indicating a fault, it’s vital to interpret whether it’s a minor issue or something that needs immediate attention. For instance, a slight delay in signal transmission might not be a concern, but an open circuit means the cable is completely broken and needs replacing.
Pay close attention to the parameters your tester measures, such as resistance, capacitance, or signal delay. These readings help you understand the condition of the cable more thoroughly. If the tester reports high resistance or inconsistent signals, it could mean the cable has internal damage or poor connections. Accurate reading interpretation requires knowing what normal readings look like for your specific cable type. Consulting the tester’s manual or manufacturer’s guidelines can help you recognize what deviations signify faults or degraded performance. Additionally, understanding the importance of high contrast ratios in projectors can aid in diagnosing image quality issues in home cinema setups.

All Features Multifunction Network Caber Tester,UTP Continuity,Cable Tracer,4" IPS Touch Screen Network Tester Support TDR,DMM,OPM,Level Meter,Network Tools,POE++ Detect,RJ45 TDR,Length,FTP,NCV
【All Features 11-in-1 Network Cable Tester】All Features ethernet cable tester with 4-inch IPS touchscreen with 800×480 resolution. Multifunction...
As an affiliate, we earn on qualifying purchases.
Frequently Asked Questions
Can a Cable Pass the Tester but Still Be Faulty?
Yes, a cable can pass the tester but still be faulty. Sometimes, cable durability issues or subtle internal damages aren’t detected by standard testing accuracy. These flaws might not affect basic connectivity but can lead to future failures or performance problems. To guarantee reliability, consider using more advanced testing methods or inspecting the cable physically. This way, you minimize the risk of undetected faults slipping through.
What Do Specific Error Codes Mean on a Cable Tester?
When you see specific error codes on your cable tester, they help with error code interpretation and troubleshooting error codes. For example, a “Open” code indicates a break in the wire, while a “Short” suggests a connection between conductors. Refer to your tester’s manual for exact meanings. Use these codes to identify issues rapidly, then test connections or replace faulty sections to guarantee proper cable performance.
How Often Should I Test My Cables for Reliability?
Did you know that regular cable testing can extend cable lifespan by up to 30%? You should test your cables at least every six months to guarantee reliability and prevent failures. Incorporate testing schedules into your cable maintenance routine, especially after any physical damage or environmental changes. Consistent testing helps catch issues early, saving you time and money while maintaining ideal network performance.
Are There Differences Between Analog and Digital Cable Testers?
When comparing analog vs digital cable testers, you’ll notice that digital testers generally offer higher tester accuracy due to precise electronic measurements. Analog testers use visual indicators, which can be less consistent and harder to interpret. Digital testers provide clearer, more detailed results, making troubleshooting easier. If you’re seeking reliable and accurate testing, digital testers are the better choice, especially for complex or critical cable installations.
What Is the Typical Lifespan of a Cable Tester Device?
A cable tester’s lifespan is like a well-worn compass, guiding you through connections for years. Typically, you can expect about 3-5 years of reliable use, depending on cable durability and how often you calibrate the tester. Regular calibration ensures accuracy and prolongs its life, while neglecting it can cause premature wear. Keep your device well-maintained, and it’ll continue to serve you faithfully through countless wiring adventures.

SGILE 9-in-1 Portable Crimping Tool Kit, 8P8C 6P6C 4P4C Connectors, RJ11/RJ12/RJ45 Cat5 Cat5e Network/Phone Cable Tester, Black
9 in 1 Network Maintenance Tools: 9-in-1 network maintenance tools meet the essential needs, which include crimping pliers,...
As an affiliate, we earn on qualifying purchases.
Conclusion
Now that you know how to interpret cable tester results, you might wonder if every fail truly means a bad cable. *Curiously*, some issues like minor resistance increases or slight delays may not affect performance immediately. So, consider testing again or inspecting further before replacing cables. Remember, a pass isn’t always perfect, but understanding what your tester shows helps you catch potential problems early—saving time and avoiding unexpected failures down the line.

Klein Tools 80072 RJ45 Cable Tester Kit with LAN Scout Jr. 2, Coax Crimper / Stripper / Cutter Tool and 50-Pack Pass-Thru Modular Data Plugs
SMART BUY: A complete, high-performance kit that offers convenience and value
As an affiliate, we earn on qualifying purchases.

iMBAPrice Professional 11-in-1 Network Tool Kit for Cat5, Cat5e, Cat6 – Complete Ethernet Cable Crimper Set with RJ45 RJ11 Connectors, Cable Tester & 110 Punch Down Tool
All-in-One Networking Solution – Includes every essential tool for network setup: crimper, punch down tool, cable tester, modular...
As an affiliate, we earn on qualifying purchases.