

This checklist is for anyone organizing a server rack, from a first-time setup to a rack that needs a more deliberate layout. It covers the main hardware and routing choices, with fit and compatibility at the center of each decision.

Get business pricing on networking and server gear
- Business-only prices and quantity discounts
- Tax-exempt purchasing
- Multiple users, one account, clear invoices
The sections follow the parts of a rack organization project: shelves, cable routing, blanking panels, screws, vertical managers, and labels. Each product pick is assessed by its name and category; where a listed pick does not clearly match the section, treat that as a compatibility check before buying.
Start by checking your rack’s dimensions, mounting points, and the equipment you need to support. Then use the look-for lists to compare options and confirm details with the product listing. Work through the physical fit first, then plan cable paths and labeling.
Rack shelves
A shelf can support equipment that does not mount directly to the rack, so its dimensions and mounting style matter before anything else. The listed pick, “Server Rack 4 Post Open Frame Rack Enclosure 19 Inch Adjustable Depth,” describes an enclosure rather than clearly identifying a shelf. Confirm that the actual item includes a shelf and that its mounting method suits your rack before treating it as this slot’s solution.
A common mistake is assuming that “19 inch” alone guarantees fit. Check the rack’s usable width and depth, the shelf’s supported depth range, and whether it attaches to two or four posts. Consider the equipment’s footprint and how it will sit on the shelf; avoid relying on an overhang or an unspecified load capacity. Also verify whether the shelf is fixed or adjustable and whether its mounting hardware is included. Match those details to your equipment dimensions and rack layout, and leave enough room to route cables without pinching them or obstructing access.
What to look for:
- Confirm the item is a shelf, not only an enclosure.
- Match the shelf’s mounting style to the rack posts.
- Check usable shelf depth against the equipment footprint.
- Verify load capacity in the product listing.
- Confirm included hardware and any depth adjustment.
Server Rack 4 Post Open Frame Rack Enclosure 19 Inch Adjustable Depth Aluminum 4

This adjustable 4-post open server rack is made of durable aluminum, supporting standard 19-inch equipment with a capacity of 900 lbs. It features an adjustable depth from 22 to 34 inches, providing stability and versatility for various installations.
Pros:
- Adjustable depth from 22 to 34 inches for versatile installation
- Supports standard 19-inch equipment with 42U capacity
- Made of lightweight yet durable aluminum for stability
Cons:
- Heavy-duty capacity may be overkill for small setups
- Assembly instructions are not detailed in the description
- Some users may find the size large for limited spaces
Best for: Shoppers who need a rack shelf and can confirm the listing’s contents
Not ideal for: Anyone needing a clearly specified shelf without further product checks
Bottom line: The listed pick does not clearly identify a shelf, so confirm the product and its mounting details before buying.
Cable management panels
Cable routing hardware helps establish a path between a rack and nearby infrastructure, but the right form depends on the route you need. The listed “ICC Cable Runway Ladder Rack System, 5 FT Rack-to-Wall Kit, Black, 1-P” is a rack-to-wall cable runway by its name, so check whether that layout matches your project. A runway kit may serve a different purpose from a panel mounted within the rack.
Before choosing, map where cables enter and leave the rack, then confirm the path’s length, mounting points, and clearance. The “5 FT” description is a useful dimension to verify against your planned route, but confirm the exact included components and installation requirements in the listing. Avoid buying based only on the word “cable management”: a wall-connected runway and an in-rack panel are not interchangeable in every layout. Check compatibility with the rack and the wall-side mounting location, and consider whether the route keeps cables accessible without crossing doors or equipment. Plan the full path before selecting hardware.
What to look for:
- Confirm whether you need a runway or an in-rack panel.
- Measure the planned route and compare it with the stated 5-foot length.
- Check rack-side and wall-side mounting compatibility.
- Verify which kit components and hardware are included.
- Plan cable access and clearance along the route.
ICC Cable Runway Ladder Rack System, 5 FT Rack-to-Wall Kit, Black, 1-Pack

This 5-foot cable runway ladder rack system provides a secure and compliant pathway for bulk cable management. Made from durable steel with a powder-coated finish, it supports up to 500 lbs and is easy to install, ideal for scalable network setups.
Pros:
- Supports heavy cable loads up to 500 lbs
- Easy to install with included hardware
- Made from durable, powder-coated steel
Cons:
- Limited to 5-foot length
- Requires compatible ICC runway sections for full system
Best for: Setups routing cables between a rack and a wall
Not ideal for: Projects that need only an in-rack cable panel
Bottom line: The named pick is a rack-to-wall runway kit, so match it to your route and mounting points.
Blanking panels
Blanking panels are a rack-layout component, but the listed pick, “Server Hardware and Troubleshooting: A Guide to Building and Maintaini,” reads like a guide title rather than a panel. It does not establish that the item is a physical blanking panel. Check the actual product listing carefully and select a panel that fits the open rack space you intend to cover.
Common mistakes include choosing a panel without matching its rack-unit height or assuming that every panel attaches the same way. Measure the empty space and confirm the rack’s mounting standard, panel height, and attachment method. If the space spans more than one rack unit, determine whether you need one panel or several. Also make sure the panel will not interfere with equipment, doors, or planned cable routes. Do not infer material, ventilation, or installation details from a title that appears to describe a book or guide; verify those specifics on the listing. For a clean fit, compare the panel dimensions with the available rack opening and confirm return or fit guidance before placing an order.
What to look for:
- Confirm the listing is for a physical blanking panel.
- Match panel height to the open rack units.
- Verify rack mounting compatibility and attachment method.
- Check clearance from equipment, doors, and cable paths.
- Confirm material and ventilation details in the listing.
Server Hardware and Troubleshooting: A Guide to Building and Maintaining Rack Se
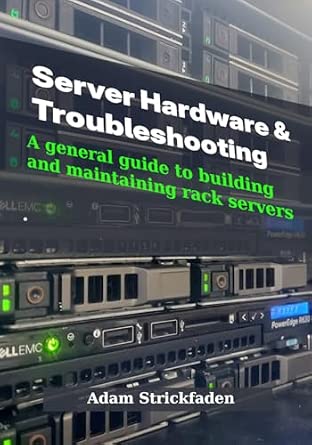
A general guide to building and maintaining rack servers. The provided content does not include further product details.
Pros:
- Well-reviewed by owners
- Fits this checklist slot
Cons:
- Availability can vary
Best for: Readers who can verify the listing is a blanking panel
Not ideal for: Anyone expecting the supplied title alone to identify compatible hardware
Bottom line: The pick’s name appears to describe a guide, so verify the listing or choose a clearly identified panel.
Rack screws
Rack screws should match the mounting points and hardware used by the rack and equipment. The listed pick, “Server Rack Cable Management D-Ring Hooks Set of 6,” describes cable-management hooks rather than screws. Treat this as a category mismatch and check the listing before relying on it for rack mounting.
When sourcing screws, identify the thread type required by your rack and the equipment rails, along with the needed length and head style. Do not assume that a screw fits because it is marketed for server racks; threaded holes and cage-nut systems call for different arrangements. Check whether cage nuts or washers are needed and whether they are included. Keep the fasteners consistent with the rack manufacturer’s guidance, and avoid forcing a screw that does not thread smoothly. If you are buying the D-ring hook set for cable routing, confirm how it attaches and where it can be placed without obstructing equipment or access. Separate that cable-management decision from the fastener selection for installed equipment.
What to look for:
- Confirm the item is a rack screw or fastener set.
- Match thread type and length to rack and equipment requirements.
- Check whether cage nuts or washers are needed and included.
- Follow the rack or equipment mounting guidance.
- Treat D-ring hooks as cable hardware unless the listing says otherwise.
Server Rack Cable Management D-Ring Hooks Set of 6
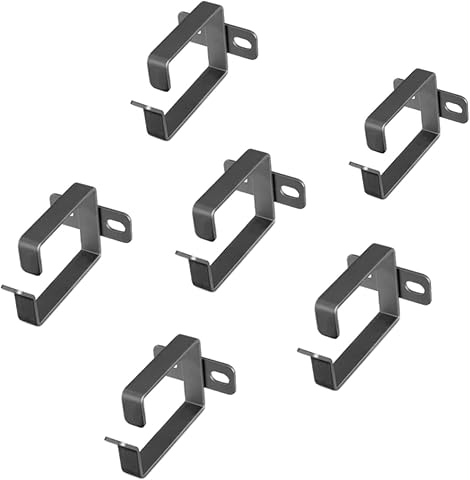
This set includes six steel D-ring hooks designed for organizing cables in server racks. They are flexible, durable, and easy to install, helping to keep wires tidy and equipment functioning smoothly.
Pros:
- Flexible individual mounting options
- Made from durable steel for long-lasting use
- Easy to install with included screws
Cons:
- Requires profile rails for installation
- Limited to specific dimensions
Best for: Buyers who can confirm the required fastener specifications
Not ideal for: Anyone using the listed D-ring hooks as mounting screws
Bottom line: The named set describes D-ring cable hooks, so verify the category and source screws that match your rack.
Vertical cable managers
A vertical cable manager provides a place to organize cable runs along the side of a rack. The listed “APC AR7588 2-Quantity Vertical Cable Manager for Netshelter” is explicitly described as a vertical manager for NetShelter. Confirm that your rack is compatible with this specific product family before ordering; the name alone does not establish fit with other racks.
Check the rack model and the manager’s mounting points, dimensions, and included pieces in the product listing. The “2-Quantity” wording suggests a two-piece quantity, but verify exactly what is supplied and whether the pair suits the sides or locations you plan to organize. Think through cable entry points and the space available beside mounted equipment. Avoid assuming that a vertical manager will fit simply because the rack is the same nominal width; attachment geometry and usable side clearance also matter. Plan how cables will enter and exit, and ensure the arrangement leaves equipment accessible. Confirm rack compatibility and the intended quantity before building the routing plan around this pick.
What to look for:
- Confirm your rack model is compatible with NetShelter hardware.
- Check dimensions and mounting points in the listing.
- Verify exactly what the two-quantity description includes.
- Measure side clearance beside installed equipment.
- Plan cable entry, exit, and access around the manager.
APC AR7588 2-Quantity Vertical Cable Manager for Netshelter

This product includes two vertical cable managers designed for Netshelter enclosures. Made with durable quality, it helps organize and manage cables efficiently in data center environments.
Pros:
- Includes two cable managers for comprehensive cable organization
- Durable construction ensures long-lasting use
- Efficiently manages cables in data center setups
Cons:
- Limited to Netshelter enclosures
- No specific installation instructions provided
Best for: Owners of compatible NetShelter racks seeking vertical cable routing
Not ideal for: Racks whose model or mounting compatibility is unknown
Bottom line: The pick is identified for NetShelter, so check your rack model and the included quantity before ordering.
Rack labels
Labels make it easier to identify cables, equipment, and rack locations during setup and later maintenance. There is no product pick for this section, so choose labels based on the surfaces and information you need to mark. Use a consistent labeling scheme that makes sense to the people who will work with the rack.
A frequent mistake is labeling only one end of a cable or using abbreviations that are unclear later. Decide what each label should identify, where it will be placed, and how both ends will correspond. Check that the label format suits the cable, panel, or equipment surface, and confirm that it remains readable in the intended location. Keep rack-unit or device identifiers consistent with your diagram or inventory if you use one. Avoid crowding labels where they cover ports, vents, or other identifying information. Before applying them, test the naming pattern on a small set and make sure it is easy to scan. Clear labels support repeatable identification as the rack changes.
What to look for:
- Choose labels suited to cable and equipment surfaces.
- Use consistent names at both ends of each cable.
- Keep labels readable and easy to scan.
- Avoid covering ports, vents, or existing identifiers.
- Align rack and device labels with your inventory or diagram.
Build the project in a practical order: first confirm rack and equipment fit, then identify the cable routes and compatible mounting hardware. Resolve the unclear shelf, blanking-panel, and screw picks before buying those categories. Add vertical management and labels once you know where equipment and cables will sit. Check compatibility early to avoid choosing parts around a product that does not match the slot.
A well-organized rack comes from measured choices and a layout people can understand. Work through one section at a time, verify each product listing, and keep the naming scheme consistent as you install. With a clear plan and careful fit checks, you can make the rack easier to maintain and adapt.
Columbus Day / Indigenous Peoples' Day Picks
long weekend sales
As an affiliate, we earn on qualifying purchases.