
Just as a map guides a traveler through unfamiliar terrain, effective labeling of your home network cables helps you navigate connections with confidence. Properly marked cables prevent confusion and save time during troubleshooting or upgrades. But achieving clarity isn’t always straightforward, and some best practices may surprise you. If you want to keep your network organized and simplify maintenance, understanding these key strategies is essential.
Key Takeaways
- Label both ends of each cable with clear, descriptive identifiers indicating connected devices or ports.
- Use durable, legible labels such as weatherproof labels or color-coded tags for easy identification.
- Maintain consistency in labeling style and color coding across all cables for quick recognition.
- Regularly review and update labels to reflect network changes or device relocations.
- Keep a documented legend of color codes and labeling conventions for reference and troubleshooting.

Have you ever struggled to identify which cable connects to which device in your home network? If so, you’re not alone. Over time, tangled cables and unclear connections can turn your setup into a confusing mess. That’s where proper cable management and effective labeling come into play. By organizing and clearly marking your cables, you can save yourself time and frustration when troubleshooting or upgrading your network.
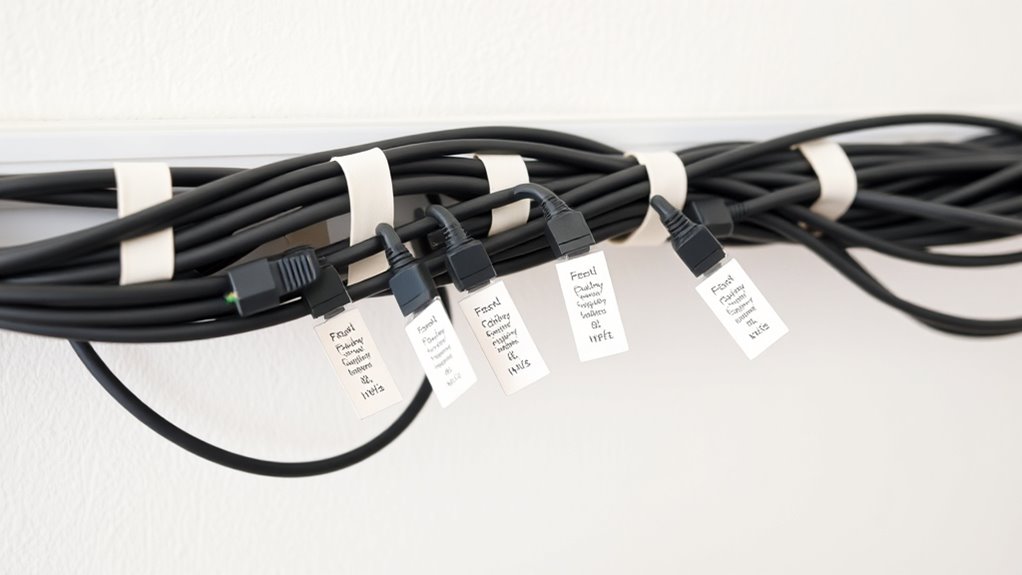
One of the first steps in good cable management is to keep your cables neat and tidy. Use cable ties or Velcro straps to bundle cables together, preventing them from tangling and making your setup look cleaner. When cables are organized, it’s easier to trace each one back to its source or destination. But organization alone isn’t enough—you also need to know what each cable does without having to follow it all the way across the room or crawl behind furniture.
This is where labeling tools become invaluable. You don’t have to invest in expensive equipment; basic labels, masking tape, or even colored cable tags work well. Label each cable at both ends with a clear, descriptive name indicating the device or port it connects to. For example, label a cable “Living Room Router” at one end and “Modem” at the other. This way, when you need to troubleshoot or make changes, you can quickly identify the right cable without guesswork.
Consistency is key. Use the same labeling method across all your cables to maintain clarity. Color coding can also help—assign specific colors to certain types of connections, such as blue for Ethernet and red for power cables. This visual cue makes it even easier to locate and differentiate cables at a glance. Keep your labels legible and weatherproof if necessary, especially if your network setup is in a basement, garage, or other less protected area.
Regularly review and update your labels as your network evolves. Devices get replaced or moved, and new cables are added. Maintaining accurate labels prevents confusion down the line. Remember, the goal is to make your home network setup as intuitive as possible, reducing the time spent troubleshooting and allowing for smoother upgrades or maintenance.
Additionally, understanding network organization can help you design a more efficient labeling system that minimizes errors and improves overall network reliability.

240 PCS Wire Tags for Cable Management – Cable Labels for Cords in 8 Colors – Durable, Self-Adhesive Cord Label Set, Tear-Resistant & Waterproof Wire Labels Tags – Compatible with Laser Printers
Easy & Reliable Cable Organization: These cable tags for cords are tear-resistant, waterproof, and install with ease -…
As an affiliate, we earn on qualifying purchases.
As an affiliate, we earn on qualifying purchases.
Frequently Asked Questions
What Tools Are Best for Labeling Cables?
You should use a cable label maker or pre-printed labels for clear cable identification. These tools help you create durable, legible labels that stick well and resist wear. Additionally, you can use color-coded tags or adhesive labels for effective labeling techniques. These options guarantee your cables stay organized, making troubleshooting easier and maintaining a neat home network setup. Choose tools that suit your cable management style for best results.
How Often Should I Update Cable Labels?
You should update your cable labels whenever you notice they’re looking more chaotic than your sock drawer. For the sake of cable longevity and labeling consistency, aim for at least once a year, or whenever you add new devices. This way, your cables stay as organized as your life isn’t, avoiding confusion and ensuring smooth troubleshooting. Remember, a well-labeled network is a happy, stress-free network.
Can I Use Color-Coding for Different Devices?
Yes, you can definitely use color-coding for different devices. Color coding benefits include quick identification and easier troubleshooting, saving you time. Just make sure your labels are durable enough to maintain their color over time, ensuring label longevity. Use consistent colors for each device type, and keep a reference chart nearby. This way, your network remains organized, and you avoid confusion when managing multiple cables.
How to Prevent Labels From Peeling Over Time?
Think of your labels as delicate tapestries; to prevent peeling over time, focus on adhesive longevity and label customization. Use high-quality, weatherproof labels designed for durability, and apply them on clean, dry surfaces. Press firmly to guarantee a strong bond, and avoid areas prone to moisture or excessive movement. Regularly check and reapply if needed. This way, your labels stay intact, keeping your network organized and easy to manage.
Is There a Standard Labeling Format for Home Networks?
There isn’t a strict standard labeling format for home networks, but you should adopt a consistent approach for cable identification. Use clear, legible labels with a simple system, like numbering or naming each device and port. Include essential info such as device type, location, or purpose. Keep labels durable and waterproof to guarantee they stay readable, and place them near connectors for quick identification.
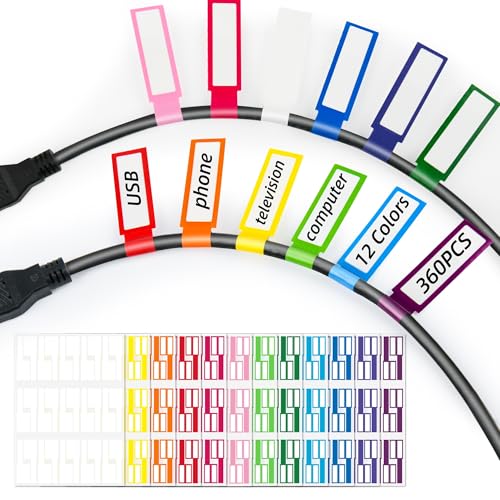
360PCS Cable Labels, 12 Colors Waterproof Cable Tags Wire Cord Label for Electronics Cable Management, Self Adhesive Color Border Cord Labels for Laser Printer and Handwriting
✔ Durable & High-Quality – Made from thick, synthetic stickers for long-lasting use, effectively water&oil proof and tear&high…
As an affiliate, we earn on qualifying purchases.
As an affiliate, we earn on qualifying purchases.
Conclusion
Properly labeling your home network cables might seem like a small task, but it’s the foundation of an organized, efficient system. While labels bring clarity and ease to troubleshooting, neglecting them can lead to chaos and frustration. Think of labels as your network’s silent guardians—simple yet essential. By maintaining consistency and accuracy, you create a reliable backbone that saves time and stress, proving that even the smallest details make the biggest difference in your home’s connectivity.

NIIMBOT White Cable Labels Maker Tape for D11/D110/D101 Label Maker, 0.49'' x 4.29''(12.5mm x 109mm), Thermal Label Tape for Home Office Labeling Tape Replacement
Compatibility: Compatible with NIIMBOT D11/D110/D101 portable bluetooth label maker for labeling, intelligently identifying label paper templates, making printing…
As an affiliate, we earn on qualifying purchases.
As an affiliate, we earn on qualifying purchases.

36-Pack Large Cable Labels with 40 Write-On Stickers, Reusable 8-Color Wire Tags for Electronics, Cord ID & Cable Management for Home Office, PC Network – Rectangle
Quickly Cable Identification: Tired of accidentally unplugging the wrong wire? SummerBrite 8 color cable labels make organizing and…
As an affiliate, we earn on qualifying purchases.
As an affiliate, we earn on qualifying purchases.